One of the primary reasons (maybe) why we even HAVE backyards is for outdoor entertaining. That and so our pets have somewhere to go to the toilet. That aside, if you want to ensure your backyard is the best space to do this (entertain, not the toilet), you need to learn how to lay decking.
A deck is an ideal way to complete the look of your outdoor space and an essential inclusion for those wanting to create a place to entertain. Luckily, you can easily learn how to lay decking with the information in this blog.
Read on for all the tips, and create your own deck today!
How to lay decking: Step by step
Step 1: Prepare your tools
We always recommend having your tools ready before you begin, and for timber decking, you’ll need a standard toolkit along with screws and pre-drilling and countersinking tools.
When it comes to how to lay decking boards, it is also important to include a power saw for cutting along with an electric drill for fixing. Outside of this, just make sure you have a measuring tape, spirit level, and some twine to ensure your deck is installed evenly.
Step 2: Choose your decking type
Unfortunately, you cannot simply walk into the hardware store and say, “one deck, please.” There is a varied range of decking options available, with the popular options being composite decking or timber. The different choices meet different requirements, so do your research beforehand or speak to the staff at your local hardware shop to find the best option for your home.
Composite decking is popular for backyard decks as it looks like wood but has far fewer maintenance requirements. This is a great option for longevity and is available in a range of sizes, colours, and finishes. Possibly most importantly, though, it’s easy to install, and it won’t splinter. You won’t even need to worry about additional waterproofing in most cases as well.

Step 3: Measure and set-out
Preparation is the key to success in most things, and one of those is most certainly laying a deck. Measure the size of your deck framework so you can ensure you get the right quantity of materials. The last thing you want to do is waste money on materials you don’t need or time on return visits to the hardware store.
Check the width and length, and map out any unique features of your home that you’ll have to work with. After you have done this, you can confidently buy then cut your decking boards to size.
Step 4: Position the first board
Lay your first board and make sure it is straight, as this will be the key to shaping how the rest of your boards sit. It is important that you figure out how to lay decking boards straight, so double-check this, as it may look fine to start with, but you’ll notice the error by the time you get to the end.
You can check that it is true by using a spirit level while also aligning the board with a string line on the outside edge of the deck’s frame.
Step 5: Fix your decking board
When you are beyond confident that the first board is straight, you can secure it to the joists. There are often two options here, fixing the decking through the top or side, which will be decided by the type of fastener you have chosen.
The key is to make sure that all of the decks are fixed in the centre of the joists. This will guarantee that they each remain secure. If you have exposed fasteners, try to keep them straight, as this will boost the aesthetic. After all, what is the point of a deck that looks bad? There isn’t one. Burn it and start again if your deck looks bad.
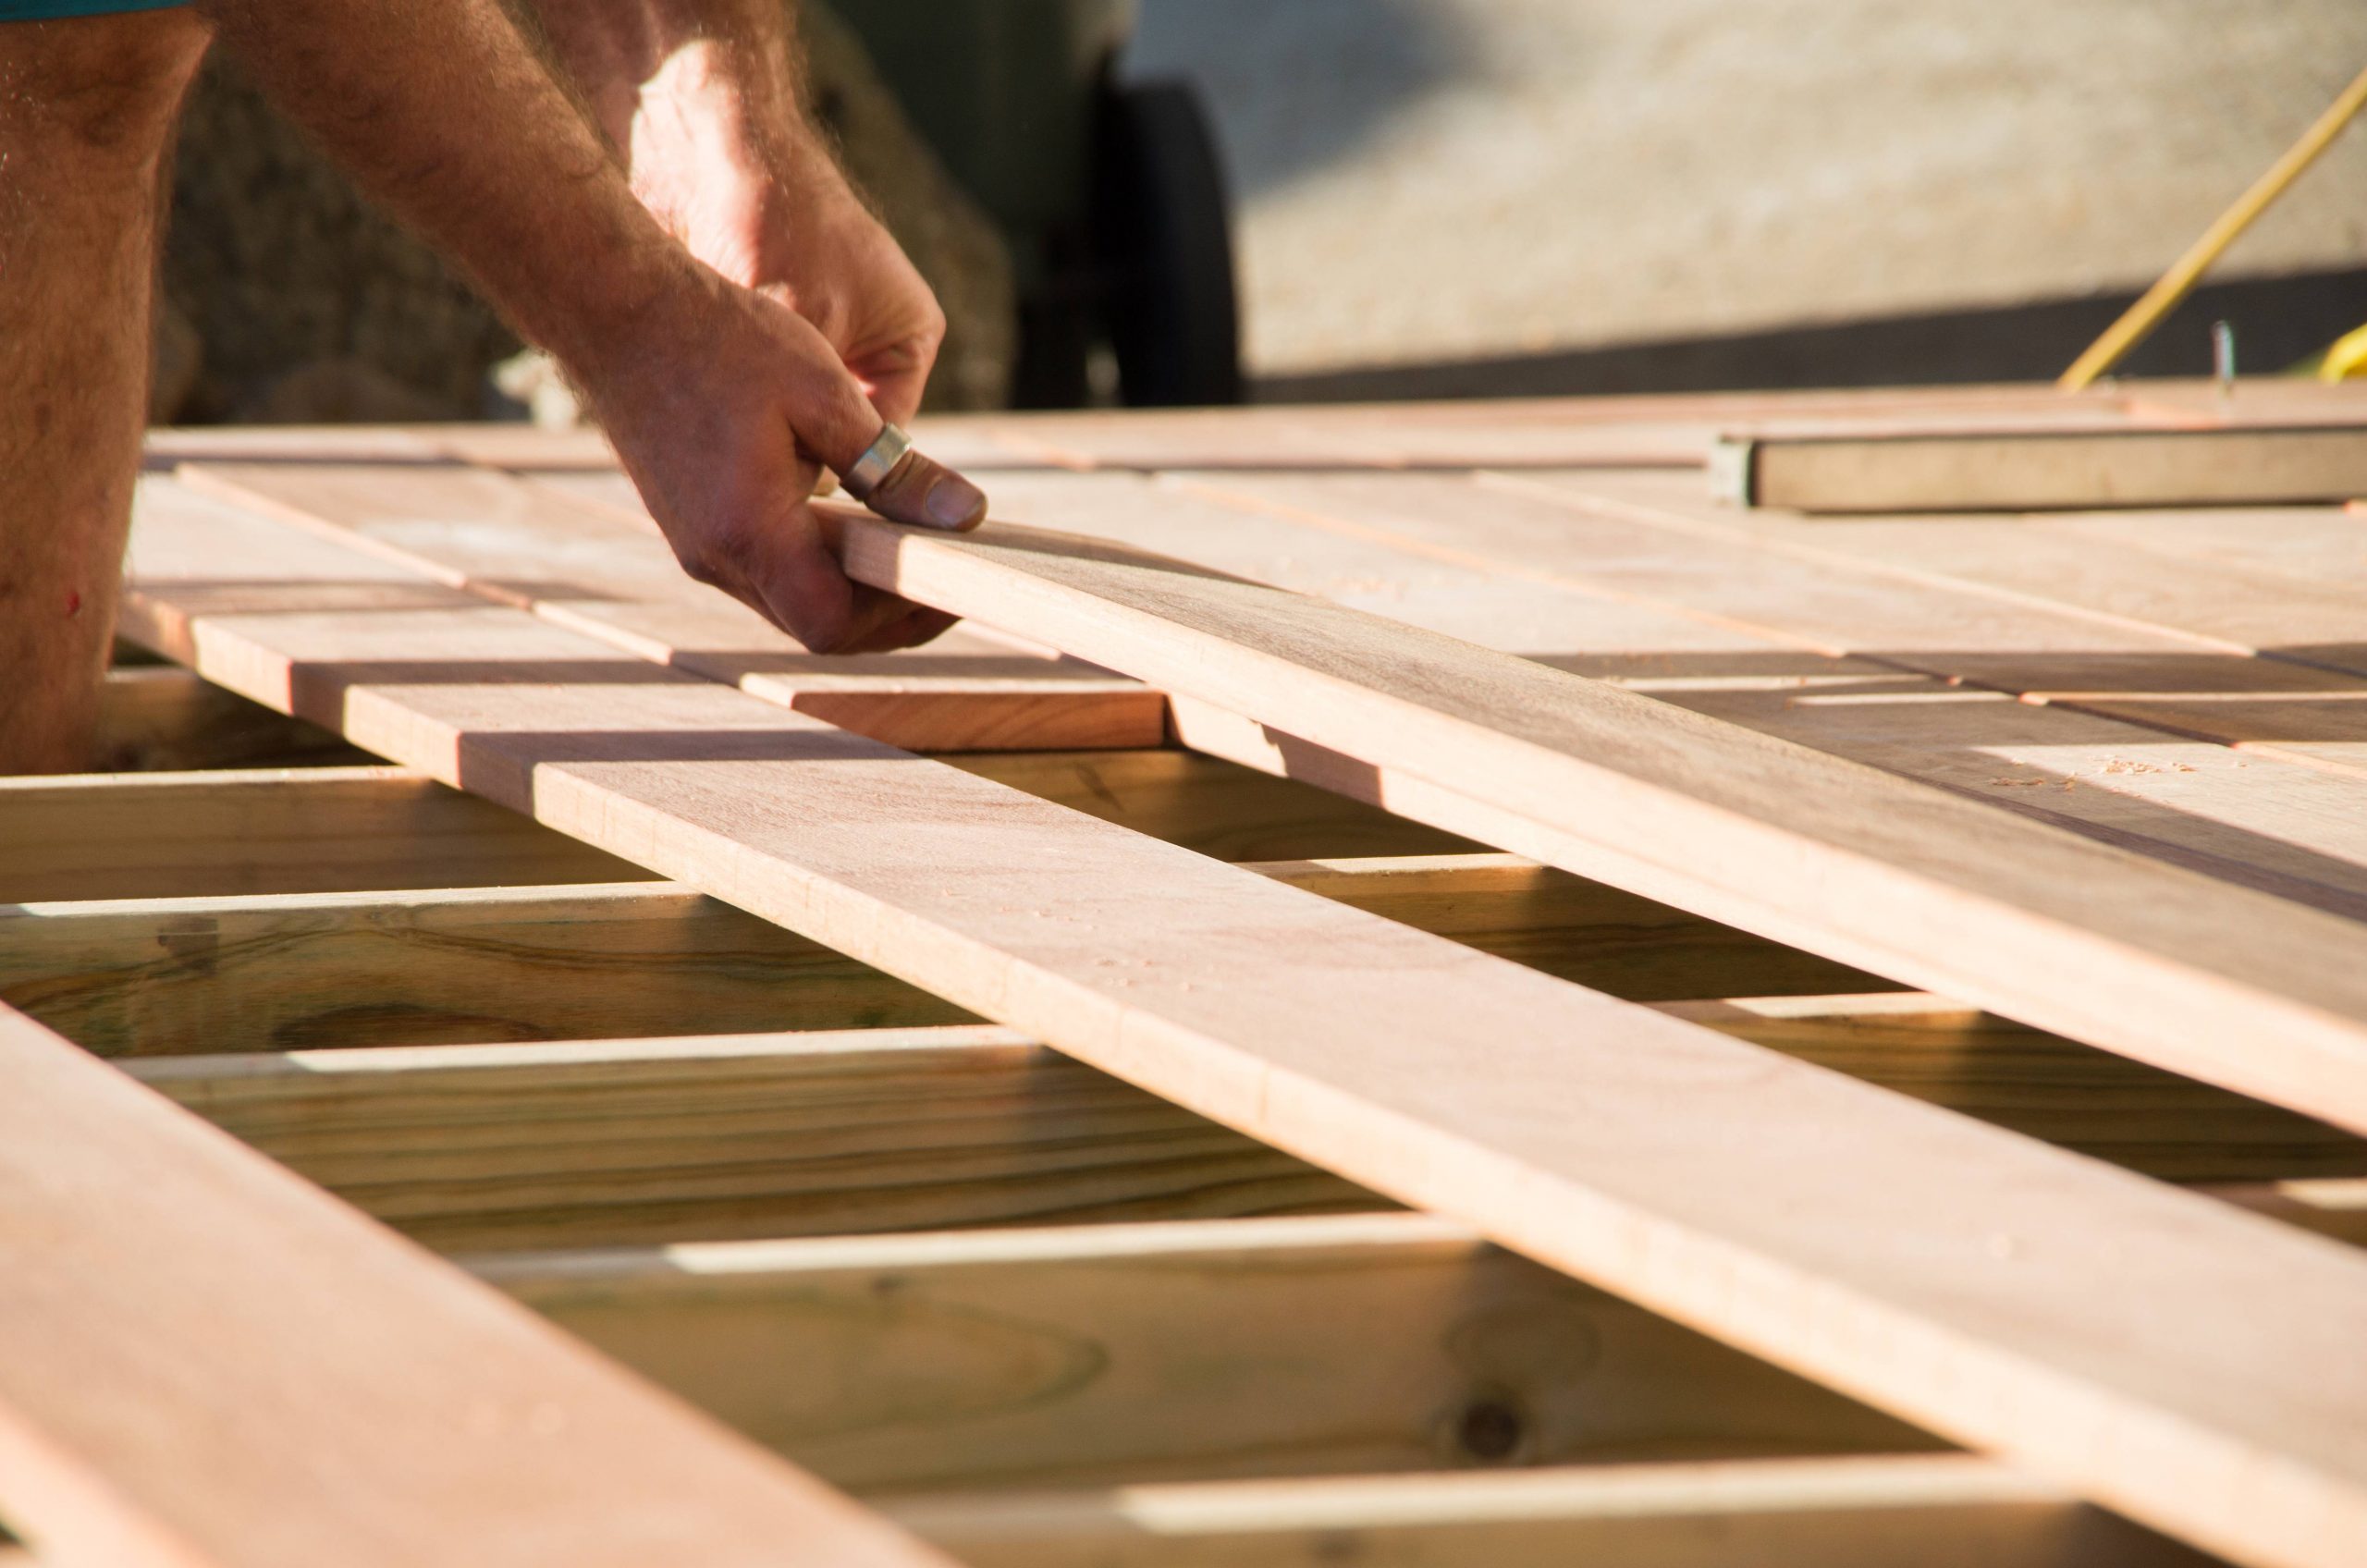
Step 6: Place and repeat
Once the first board is in things get a little repetitive, which is unavoidable. Essentially, you’ll be repeating the above step until every board is in and the deck’s framework is covered. Make sure there is a 3-6mm gap between each board. This may vary depending on the type of boards you use, but the goal here is to allow for expansion.
You can make sure this gap is consistent with spacers or wedges. If you don’t have any, just knock a nail into the joist beside every decking board, and sit the next board flush with the nail.
Also remember that if you have a large deck that requires multiple boards to cover the length, make sure the two separate boards join up over a joist. If possible, try to stagger these joins to avoid a straight gap along the length of the deck.
Pro tip: While you are doing this somewhat monotonous task, lay your boards in small groups. This makes it easier to make adjustments as you go and ensure your decking is still straight with the spirit level and stringline.
Step 7: Trim the ends of the deck
When you have finished laying and securing the deck, cut the overhanging boards leaving roughly a 20mm overhang on the edge of the frame. The goal here is to ensure the finish is consistent.
Step 8: Add finishes
Depending on the type of deck you have chosen, you may need to waterproof, screen the exposed frame or add some polish to give a nice finish. Do one final check to make sure everything is secure, and hey presto, you have a nice new deck, ready to enjoy with your family and friends!

Frequently asked questions
Do I need to learn how to lay Merbau decking boards?
While you do not have to lay this particular type of board, there are some key things to remember if you do choose it. When learning how to lay Merbau decking boards, it is important to remember that a Merbau clip relies on its teeth locking into the board with a fixing tool.
The uprights of the clip set the direction which indicates the direction you should lay your boards. Lay the first row with the uprights pointing towards the front and ensure the KlevaKlips sit squarely on the outside joists.
Can you learn how to lay timber decking on soil?
You have two options when you build a deck; you can sit it directly on the ground or on top of risers as a floating deck. If you decide that you want to lay it directly on the ground, you run the slight risk of it being more susceptible to absorbing moisture. This can lead to a need for some additional maintenance.
Can I build a deck directly on the ground?
While you can build a deck directly on the ground, you must build it with ground-contact wood. It is also vital that you ensure the substructure is adapted for minimal height. A ground-level deck should always be elevated in some way.
Take control of your own deck!
Hopefully, now you have some tips to help you lay your own deck, turning your outdoor area into the ultimate entertaining space. As a bonus, a good deck can also help increase the value of your property, making it more attractive to potential buyers if you are planning on selling.
If you have read the above and think that it may be a little outside of your experience range, or you simply do not have a free weekend to put this all together, ask for help! Should you restore or build a deck? Whatever the answer may be, our database of skilled taskers will offer some deck-making pros who can swoop in, set up your deck for you properly, and leave you to enjoy the fruits! Save time and enjoy the peace of mind of knowing that the job has been done properly.
We also have a range of helpful articles and resources that can give you inspiration, tips, and how-tos for a variety of other home improvement DIY projects. Have a read and get to work in your spare time on some projects. Improving your space is always more enjoyable when you have done the work yourself!